

A trekking backpack can feel perfectly manageable when you first put it on at home and surprisingly heavy a few hours later.
That’s because carrying a backpack on a trek isn’t the same as carrying it around your house. Every extra kilogram has to travel with you over every climb, descent, rock, and uneven section of trail.
The solution isn’t simply buying a bigger or more expensive backpack. The real skill is learning what to carry, what to leave behind, and where to put everything inside the pack.
Here’s a practical way to pack your trekking backpack without turning it into a burden.
Start With the Trek, Not the Backpack
Before putting anything inside your backpack, understand the trip you’re preparing for.
A few hours on a maintained trail doesn’t require the same equipment as a three-day remote trek.
Consider:
- How many days you’ll be away
- Whether you’re camping
- Expected weather
- Availability of food and water
- Distance between water sources
- Temperature
- Terrain
- Whether you’ll carry your own tent and sleeping equipment
- Whether you’re trekking independently or with a group
This determines what you actually need.
For example, if accommodation and meals are already provided at your destination, carrying camping equipment makes no sense.
The best way to reduce backpack weight is to eliminate unnecessary items before they ever enter the backpack.
Weigh Your Gear Before Packing
You don’t need professional equipment to do this.
Put your major items on a basic weighing scale before your trip.
Look at the weight of your:
- Backpack
- Tent
- Sleeping bag
- Sleeping pad
- Water
- Cooking equipment
- Food
- Clothing
You may be surprised by how quickly the numbers add up.
Water is particularly important because one litre weighs roughly one kilogram. Carrying an extra three litres “just in case” means carrying approximately three additional kilograms.
That doesn’t mean you should carry too little water. It means you should plan your water supply around the route and reliable refill opportunities.
Use the “Do I Really Need This?” Test
Before putting something into your backpack, ask:
What problem does this solve?
If the answer is important, pack it.
If the answer is “it might be useful,” think a little harder.
This doesn’t mean removing safety equipment. First-aid supplies, navigation equipment, emergency communication, rain protection, and other essential items should stay.
Instead, look for unnecessary duplicates and comfort items that you can live without for a day or two.
Three jackets probably aren’t necessary.
Five different snacks probably aren’t necessary.
A full-size bottle of toiletries definitely doesn’t need to come along.
Small decisions like these can remove kilograms from a backpack.
Pack Heavy Items Close to Your Back
Once you’ve decided what to carry, where you put it matters.
As a general rule, heavier items should sit relatively close to your back and around the middle of the pack.
This helps keep the load more stable and prevents the backpack from pulling excessively away from your body.
Avoid putting heavy equipment at the very bottom or hanging it far outside the backpack unless the pack is specifically designed for that purpose.
Your goal is to create a compact, balanced load rather than a backpack that feels like it’s constantly pulling you backward.
What Goes at the Bottom?
The bottom of your backpack is a good place for things you won’t need during the day.
For an overnight camping trip, this could include:
- Sleeping bag
- Sleeping clothes
- Spare clothing
- Other lightweight items
These are generally things you’ll only need once you reach camp.
If your sleeping bag is compressible, use a suitable compression sack if recommended by the manufacturer. Don’t automatically compress delicate insulation as tightly as possible for long periods.
Keep the Middle for Heavier Equipment
The middle section of the backpack is usually where your heavier equipment should go.
Depending on your trip, this could include:
- Food
- Cooking equipment
- Tent components
- Water carried close to your back
- Other dense equipment
Keep these items close to your body rather than toward the outside of the pack.
This improves balance and reduces the feeling that your backpack is pulling backward.
Keep Frequently Used Items Near the Top
Some equipment needs to be available quickly.
You don’t want to empty half your backpack every time it starts raining.
Keep frequently used items toward the top or in easily accessible pockets.
These may include:
- Rain jacket
- Snacks
- Water
- Headlamp
- First-aid kit
- Map
- Sunscreen
- Phone
- Gloves or an extra layer
Think about what you might need while walking, not just what you need at camp.
Use the Outside Pockets Carefully
External pockets are useful, but don’t turn them into storage for everything you couldn’t fit inside.
Small items such as water bottles, snacks, trekking poles, and rain gear can be convenient to access from outside.
But avoid hanging heavy or fragile equipment from the outside of your backpack unless the pack is designed for it.
A sleeping bag or tent strapped loosely to the outside can also become a problem in rain, brush, or tight sections of trail.
The more compact your load, the less likely it is to snag on branches or throw off your balance.
Keep Your Water Accessible
Water is one of the heaviest things you’ll carry, so placement matters.
If your backpack has an internal hydration sleeve, a hydration bladder can make drinking easier while walking.
If you use bottles, keep at least one somewhere you can reach without completely unpacking your bag.
Don’t bury all your water underneath clothing and camping equipment.
At the same time, don’t automatically carry an excessive amount. Check your route beforehand and understand where reliable water sources are located.
If you plan to drink from natural sources, bring an appropriate purification method or filter rather than assuming clear-looking water is safe.
Protect the Things That Must Stay Dry
Rain can turn a well-organized backpack into a disaster.
Your sleeping bag, spare clothing, electronics, food, and important documents should have some form of protection from moisture.
A pack liner, dry bags, or waterproof pouches can help.
You don’t necessarily need an individual waterproof bag for every item. Group things according to their importance and how much protection they need.
For example, keeping your sleeping bag in a waterproof bag is far more important than making sure every snack wrapper is individually protected.
Don’t Forget Weight Distribution
Once everything is packed, put the backpack on.
Adjust the shoulder straps, hip belt, and load-lifter straps according to the backpack manufacturer’s instructions.
Your hip belt should carry a significant portion of the load rather than leaving all the weight hanging from your shoulders.
Walk around for a few minutes.
Then walk up and down some stairs if you can.
Ask yourself:
Does the backpack stay close to my body?
Is it pulling backward?
Are my shoulders taking too much pressure?
Does anything move around inside?
If something feels wrong at home, fix it before the trek.
Your Backpack Doesn’t Need to Be Full
This is one of the most important lessons for beginners.
A backpack isn’t supposed to be filled simply because there is empty space.
Empty space is useful.
If you have room left after packing your essentials, that’s perfectly fine. Don’t fill it with extra clothing, unnecessary gadgets, additional food, or things you probably won’t use.
A lighter backpack usually means:
- Less fatigue
- Easier climbing
- Better balance
- Less strain on your body
- More enjoyable walking
The “One Is Enough” Rule
Look for opportunities to remove duplicates.
Do you need two large towels?
Do you need three pairs of trekking pants for a one-night trip?
Do you need multiple knives or cooking tools?
Do you need a separate gadget for something your phone already does reliably?
Sometimes the easiest way to reduce weight isn’t buying lighter equipment. It’s carrying fewer pieces of equipment.
Pack for the Worst Reasonable Condition
There’s an important difference between being prepared and overpacking.
You should prepare for conditions that are reasonably possible on your trek.
If rain is possible, carry rain protection.
If temperatures can drop significantly at night, carry appropriate warm clothing.
If navigation could become difficult, carry a backup.
But don’t pack for every imaginable disaster.
Your gear should reflect the actual environment, forecast, route, and duration of your trip.
A Simple Packing Order
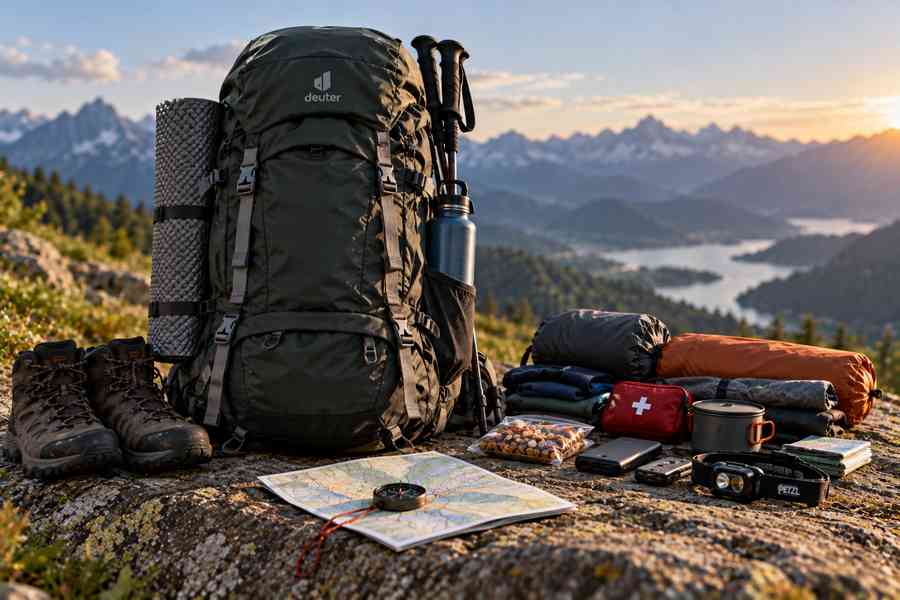
For a typical overnight trek, your backpack could be organized roughly like this:
Bottom: Sleeping bag, sleeping clothes, and lightweight items you won’t need during the day.
Middle: Heavier equipment such as food, cooking equipment, and other dense gear.
Close to your back: The heavier items that benefit from being carried near your body’s center.
Top: Rain jacket, extra layer, snacks, first-aid kit, and other frequently needed items.
External pockets: Water, phone, map, sunscreen, and small items you want to access quickly.
This isn’t a strict formula. Your backpack’s own design and your equipment will determine the exact arrangement.
Do a Final Weight Check
Before leaving home, put on the fully packed backpack.
Don’t guess.
Feel what the actual load is like.
Then remove anything that isn’t necessary.
If possible, do a short walk with the fully loaded backpack before your trek. You’ll quickly discover whether the shoulder straps hurt, whether something is moving around, or whether you’ve packed far more than you need.
Remember that your water and food weight will change during the trek, so the backpack may become lighter as you go.
Pack Smarter, Not More
A good trekking backpack isn’t about fitting the maximum amount of gear into the available space.
It’s about carrying exactly what you need in the most efficient way possible.
Start by understanding your trek. Remove unnecessary items. Keep heavy equipment close to your back, frequently used items accessible, and important gear protected from rain.
Then walk with the loaded backpack before the actual trip.
The lighter and better organized your pack is, the less you’ll think about it while you’re on the trail.
And that’s exactly what you want.
Your backpack should support your adventure — not become the hardest part of it.